Introduction to Salmon Belly Torched Nigiri-Style
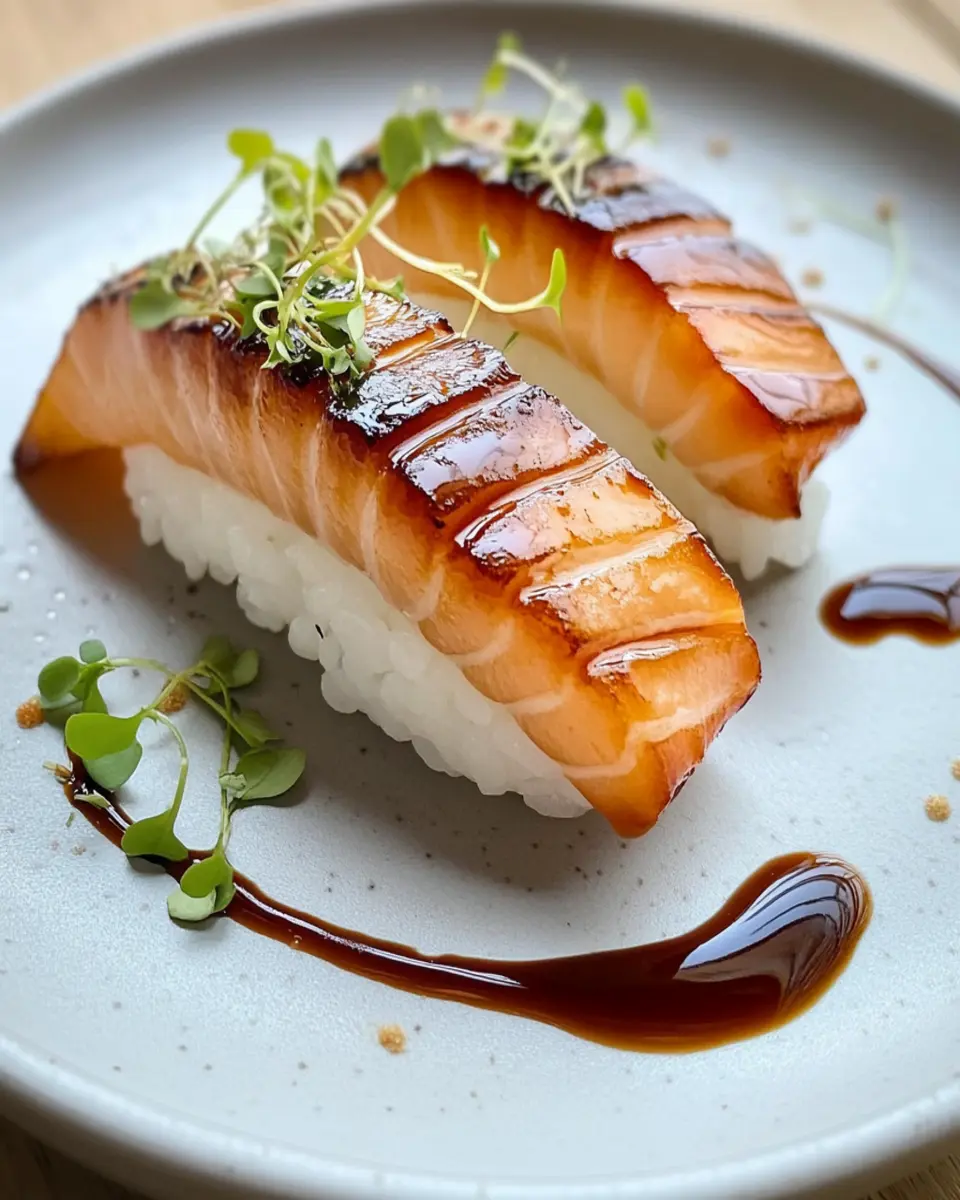
Salmon belly torched nigiri-style is a delightful dish that embodies the essence of Japanese cuisine. This dish combines the rich, buttery flavor of salmon belly with the delicate texture of sushi rice. Perfect for young professionals and homemade-food lovers, it offers a quick yet impressive way to enjoy sushi at home.
The Allure of Torching
Torching the salmon belly not only enhances its flavor but also adds a visually appealing touch to your plate. The slight caramelization from the torching process creates a delightful contrast to the softness of the sushi rice, making each bite a melt-in-your-mouth experience.
Imagine serving this dish at a small gathering, where the sizzling sound of the torch captures everyone’s attention. It’s the kind of culinary show that invites conversations and compliments, making it perfect for time-pressed individuals looking to impress without spending hours in the kitchen.
Why You Should Try It
If you’ve never experienced the joy of making sushi at home, this recipe is a fantastic starting point. With just a few simple ingredients and straightforward instructions, you can create a dish that rivals what you would find at a high-end sushi restaurant. Plus, the process of shaping the rice and torching the salmon is not only fun but also an artistic expression in the kitchen.
This recipe is not just about taste; it’s about creating a memorable experience. So gather your ingredients, invite a friend, and dive into the world of homemade sushi. You’ll be surprised at how satisfying it is to create this beautiful dish yourself. As you savor the flavors, you’ll understand why salmon belly torched nigiri-style is becoming a favorite among sushi enthusiasts everywhere.
Key Ingredients
Salmon belly torched nigiri-style features a handful of key ingredients that together create a culinary masterpiece. Understanding each component will enhance your cooking experience and ensure the best results.
Salmon Belly (100 grams)
Salmon belly is the star of this dish, prized for its rich flavor and buttery texture. Sourced from high-quality salmon, it provides a melt-in-your-mouth experience when lightly torched, enhancing its natural umami flavor.
Sushi Rice (1 cup)
Sushi rice is essential for achieving the perfect texture and taste. Short-grain rice is sticky enough to hold its shape when molded, making it ideal for nigiri. It absorbs the flavors of the vinegar mixture, creating a harmonious base for the salmon.
Rice Vinegar (2 tablespoons)
Rice vinegar adds a subtle tang that balances the rich flavors of the salmon. It also helps to season the sushi rice, giving it the characteristic taste that complements the fish beautifully.
Sugar (1 teaspoon)
A touch of sugar in the vinegar mixture helps to round out the flavors, adding a hint of sweetness that enhances the overall dish. It works in harmony with the tanginess of the rice vinegar.
Salt (1/2 teaspoon)
Salt is a key player in enhancing the flavors of the dish. It ensures that the sushi rice is well-seasoned and elevates the taste of the salmon belly.
Nori Seaweed (2 sheets)
Nori provides a slight crunch and a savory flavor that contrasts with the soft textures of the rice and salmon. It can be cut into strips to garnish the nigiri or served on the side.
Wasabi (to taste)
Wasabi adds a spicy kick that many enjoy with sushi. Use it sparingly to enhance flavors without overwhelming the palate.
Soy Sauce (for serving)
Soy sauce is a classic accompaniment, providing a salty depth that pairs perfectly with the rich salmon. It’s best served on the side for dipping, allowing you to control the flavor intensity with each bite.
Each of these ingredients plays a vital role in creating the perfect Salmon Belly Torched Nigiri-Style, ensuring that you enjoy a delightful and authentic sushi experience at home.

Why You’ll Love This Recipe
Salmon belly torched nigiri-style is not just a meal; it’s an experience that delights the senses. With its rich flavor and melt-in-your-mouth texture, this dish is perfect for impressing friends or enjoying a quiet night in. It’s quick to prepare, making it ideal for busy young professionals who still want to savor gourmet flavors at home.
A Culinary Adventure
What sets this recipe apart is the unique combination of cooking techniques. Lightly torching the salmon belly brings out its natural oils and enhances its taste, creating a flavor explosion with every bite. The simplicity of the ingredients allows you to focus on the quality, ensuring that each component shines through.
Perfect for Any Occasion
Whether it’s a casual dinner or a special occasion, salmon belly torched nigiri-style fits perfectly. It’s easy to customize with different garnishes or side dishes, allowing you to tailor it to your guests’ preferences. Plus, the quick preparation time means you can spend less time in the kitchen and more time enjoying the company of your friends.
This recipe not only satisfies your taste buds but also provides a chance to showcase your culinary skills. With just a few simple steps, you can create a stunning dish that brings the essence of Japanese cuisine right to your dining table.
Variations
Salmon belly torched nigiri-style is a versatile dish that allows for plenty of creativity. While the original recipe is a delight, experimenting with different ingredients can elevate your culinary experience even further.
Alternate Proteins
If you’re feeling adventurous, consider replacing the salmon belly with other types of fish such as tuna, mackerel, or even a flavorful white fish like sea bass. Each option brings its own unique taste and texture, allowing you to discover new favorites. Additionally, try using smoked salmon for a different flavor profile!
Flavor Enhancements
To add more depth to your nigiri, consider incorporating additional toppings or sauces. A drizzle of spicy mayonnaise or a sprinkle of sesame seeds can add a delightful twist. You might also experiment with different types of wasabi or even pickled ginger as a garnish.
Vegetarian Options
For those looking for a vegetarian alternative, consider using grilled or torched vegetables, such as eggplant or zucchini. These can be marinated in soy sauce or miso for added flavor, while still providing that satisfying texture in every bite. Whether you’re a seafood lover or a vegetarian, there’s a variation of salmon belly torched nigiri-style for everyone!
Cooking Tips and Notes
When preparing Salmon Belly Torched Nigiri-Style, ensuring the best flavor and texture is essential. Here are some tips to elevate your dish and make the process smoother.
Selecting the Right Salmon
Choosing high-quality, fresh salmon belly is crucial for a successful nigiri. Look for vibrant color and a firm texture, as these indicate freshness. If possible, buy your salmon from a trusted fishmonger, and don’t hesitate to ask for recommendations on the best cuts.
Perfecting Your Sushi Rice
The key to great sushi rice is in the cooking and seasoning. Always rinse the rice until the water runs clear to remove excess starch, which prevents it from becoming gummy. After cooking, let the rice cool slightly before mixing in the vinegar, sugar, and salt. This helps the seasoning absorb better without making the rice too wet.
Mastering the Torch Technique
When torching the salmon belly, use a kitchen torch held at a distance of about 6 inches. Move the flame in a back-and-forth motion to prevent overcooking. The goal is to create a slight crispness on the outside while keeping the inside tender and juicy. Practice makes perfect, so don’t rush this step!
Serving Suggestions
Nigiri is best enjoyed fresh, so serve it immediately after preparation. Pair it with a side of soy sauce and a dab of wasabi for an authentic experience. You can also add a sprinkle of sesame seeds or thinly sliced green onions for an extra touch. Enjoy experimenting with flavors to make this dish your own!
Serving Suggestions
Salmon belly torched nigiri-style is not only a treat for the taste buds but also a visual delight. When serving this exquisite dish, presentation is key. Arrange the nigiri pieces on a decorative plate, and consider adding a few garnishes to elevate the overall look.
Accompaniments
Pair your nigiri with traditional accompaniments like soy sauce and wasabi for dipping. A small dish of pickled ginger can also enhance the experience by cleansing the palate between bites. If you want to impress your guests, consider serving the nigiri alongside a refreshing cucumber salad or a light miso soup.
Beverage Pairings
For beverage pairings, a crisp sake or a light Japanese beer complements the flavors beautifully. If you prefer non-alcoholic options, green tea provides a refreshing contrast to the rich salmon belly. The right drink can elevate your dining experience and make your meal even more memorable.
Enjoy your salmon belly torched nigiri-style fresh, and don’t forget to take a moment to appreciate the artistry of your creation before digging in!
Time Breakdown
When preparing Salmon Belly Torched Nigiri-Style, managing your time effectively helps ensure a smooth cooking experience. Here’s a quick breakdown:
Preparation
Approximately 20 minutes is needed to prepare the sushi rice and gather your ingredients. This step includes cooking the rice, cooling it, and mixing in the seasoning.
Cooking
The cooking phase takes about 30 minutes, primarily for torched salmon belly and shaping the nigiri. This step is crucial for achieving that perfect melt-in-your-mouth texture.
Total Time
In total, expect the entire process to take about 50 minutes from start to finish. To maximize efficiency, consider prepping the rice and seasoning while the salmon is being sliced and torched. This way, you can streamline the steps and enjoy your delicious nigiri sooner!
Nutritional Facts
Salmon Belly Torched Nigiri-Style is not only delicious but also provides a satisfying nutritional profile. Each serving contains approximately 300 calories, with 15 grams of protein, making it a great choice for a balanced meal. Additionally, with only 1 gram of sugar and 50 milligrams of sodium, this dish is mindful of health without sacrificing flavor. Enjoying this mouthwatering dish allows you to indulge in a gourmet experience while keeping your dietary goals in check!
FAQ based on “People Also Ask”
What is salmon belly?
Salmon belly is the fatty part of the salmon fish, known for its rich flavor and buttery texture. It is often favored in sushi dishes for its melt-in-your-mouth quality, especially when torched, as it enhances the natural oils and flavors.
How do you torch salmon belly?
To torch salmon belly, slice it into thin pieces and use a kitchen torch to apply direct heat. Hold the torch about 6 inches away and move it back and forth to evenly cook the surface without overcooking the fish. This method adds a delightful char and intensifies the flavor.
Can you use other fish for nigiri?
Absolutely! While salmon belly is a favorite for its unique taste, you can experiment with various fish like tuna, mackerel, or even vegetarian options like grilled eggplant. Each fish brings its own flavor profile, allowing for a range of delicious nigiri variations.
How do you serve nigiri?
Nigiri is best served fresh, with a side of soy sauce and a small amount of wasabi for dipping. Adding garnishes like pickled ginger can enhance the dining experience, providing a refreshing contrast to the rich flavors of the fish.
Conclusion
Salmon Belly Torched Nigiri-Style is a remarkable dish that brings the authentic flavors of Japanese cuisine into your home. With its melt-in-your-mouth texture and rich taste, it’s a perfect choice for both casual dinners and special occasions. This recipe is not only easy to follow but also allows for creativity with different fish and garnishes.
As you experiment with this delightful dish, remember that the key to great nigiri is using fresh ingredients and serving it immediately for the best flavor. Whether you’re a seasoned chef or a beginner, making this dish is sure to impress. So gather your ingredients, invite some friends, and enjoy the art of sushi-making! Don’t forget to share your creations and experiences!
Print
Salmon Belly Torched Nigiri-Style
- Total Time: 50 minutes
- Yield: 2 servings 1x
- Diet: Gluten Free
Description
A delightful nigiri-style dish made with torched salmon belly that melts in your mouth.
Ingredients
- 100 grams salmon belly
- 1 cup sushi rice
- 2 tablespoons rice vinegar
- 1 teaspoon sugar
- 1/2 teaspoon salt
- 2 sheets nori seaweed
- wasabi to taste
- soy sauce for serving
Instructions
- Cook sushi rice according to package instructions and let it cool.
- In a small bowl, mix rice vinegar, sugar, and salt until dissolved.
- Fold the vinegar mixture into the cooled rice gently.
- Shape sushi rice into small oval forms.
- Slice salmon belly and lightly torch it to enhance flavor.
- Place a slice of salmon belly atop each rice ball.
- Garnish with a small amount of wasabi and serve with soy sauce.
Notes
- Ensure the salmon is fresh and of high quality for the best flavor.
- Nigiri is best served immediately after preparation.
- Experiment with different types of fish for variation.
- Prep Time: 20 minutes
- Cook Time: 30 minutes
- Category: Main Course
- Method: Torched
- Cuisine: Japanese
Nutrition
- Serving Size: 2 pieces
- Calories: 300
- Sugar: 1g
- Sodium: 50mg
- Fat: 20g
- Saturated Fat: 3g
- Unsaturated Fat: 15g
- Trans Fat: 0g
- Carbohydrates: 30g
- Fiber: 1g
- Protein: 15g
- Cholesterol: 60mg


